Tape-in hair extensions are an easy and natural way to add length and volume to your hair. Whether it’s for a special event or daily wear, proper application is key to achieving a seamless look. In this guide, we’ll walk you through the steps to apply tape-in extensions, share expert tips, and help ensure your extensions stay secure and beautiful.
What do I need to apply tape ins?
Before you begin, gather the following tools:
- Tape in hair extensions
- Tail comb or fine-tooth comb: Used to create precise sections for even application.
- Clips or hair ties: Keep hair organized and sectioned during installation.
- Hair extensions clamp(optional): Secures extensions in place for a smooth, even fit.

Easy Steps to Apply Tape In Hair Extensions
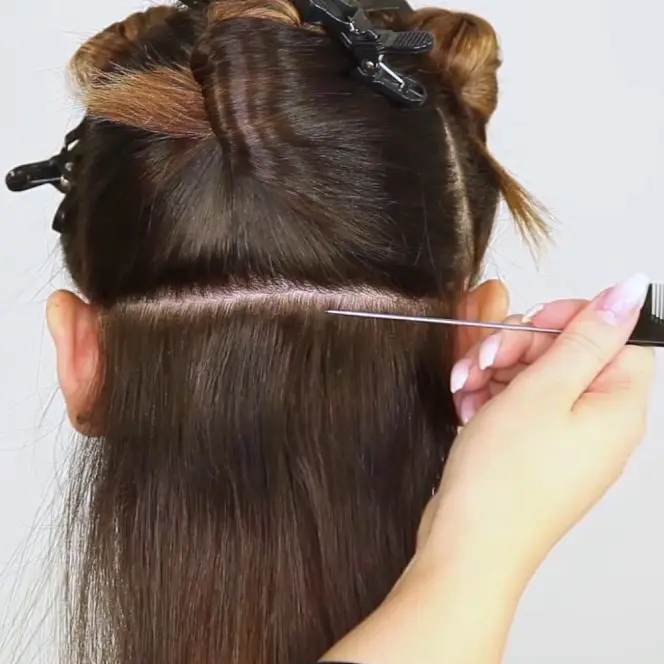
Step 1: Prepare Your Hair
- Wash and dry your hair: Avoid using heavy conditioners or oils, as they can interfere with the adhesive.
- Brush your hair: Remove any tangles to ensure a smooth application process.
- Section your hair: Use a tail comb to create a horizontal parting at the nape of your neck. Clip the rest of your hair out of the way.
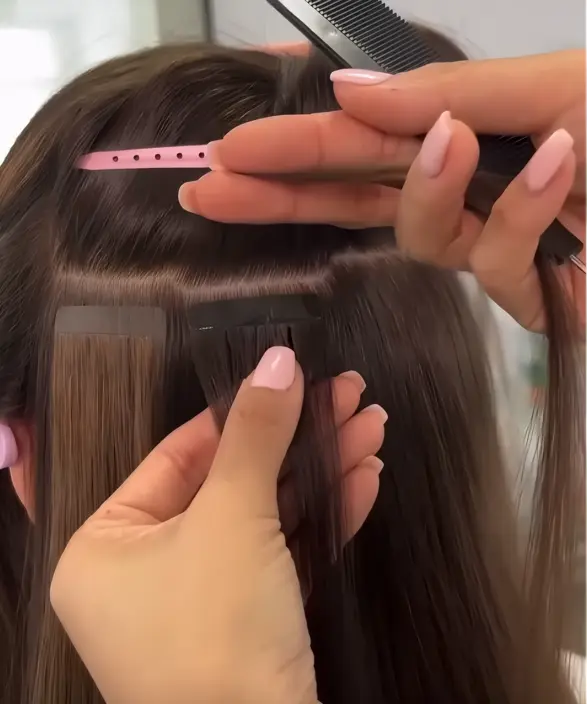
Step 2: Prepare Tape in Hair Extensions
- Remove the backing: Peel off the protective backing from the tape tabs on the hair extensions. Be careful not to touch the adhesive with your fingers, as oils can reduce its stickiness.
- Align the extensions: Hold the weft up to your hair to ensure it’s the right size for the section. Trim the tape if necessary.
Step 3: Apply Tape in Hair Extensions
- Secure first piece: Take a thin section of your hair, and place the tape ins underneath it. Press the adhesive side firmly against your hair.
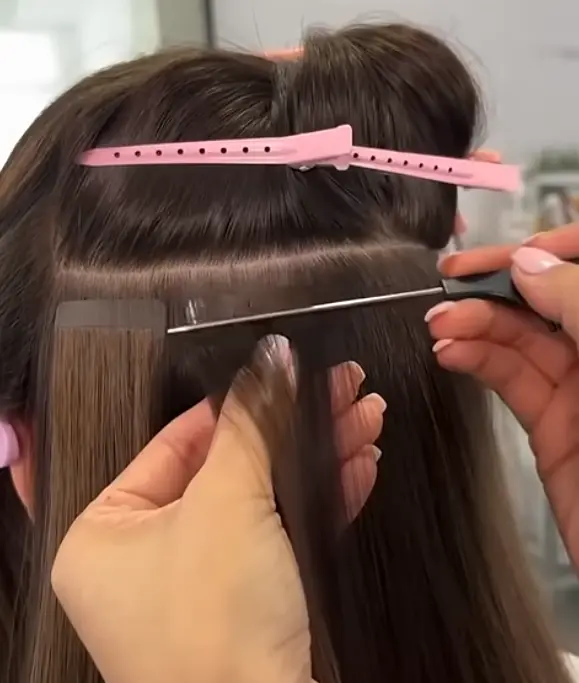
- Sandwich hair: Take another tape ins and place it on top of your hair. Press firmly to ensure a strong bond. Can use extensions clamp for added security.
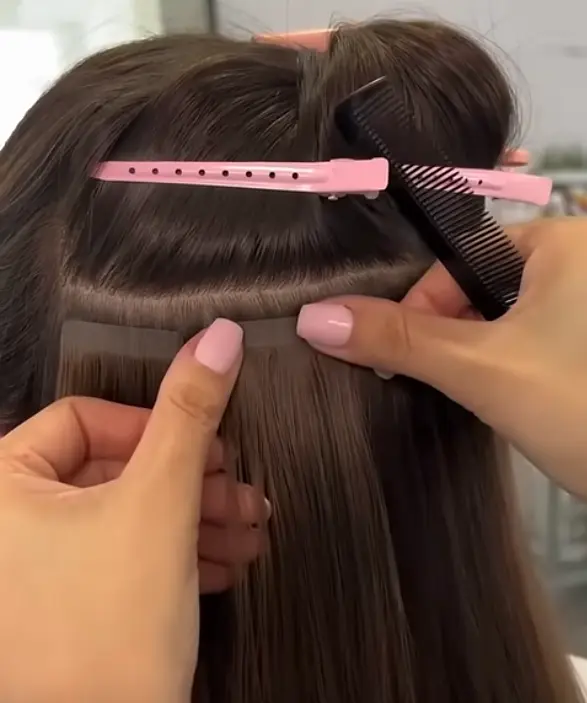
- Repeat the process: Move upward in even rows, creating partings and apply tape in hair extensions until you achieve your desired volume and length.
Was this article helpful?
YesNo